
When you start writing a new post in Ghost, you likely want to either start with a structure or include elements you typically use.
Ghost has a very easy way for you to do this, but it's a hidden feature. In fact, we think it's Ghost's best hidden feature. (To be fair, this is documented by Ghost, but most Ghost users we talk to have no idea they can do this.)
Thanks goes to the brilliant Joel Warner, The Lever's managing editor and the author of the upcoming book, The Curse of The Marquis De Sade (pre-order it here), who taught us this trick.
Here's how you create a reusable and editable newsletter template in Ghost: (video how-to is below the text instructions)
- Create a dummy post.
- Add in all of the sections that you usually put into a post, whether that's email CTAs for free readers, intro text that only shows up in emails, your Outpost Tip Jar, or your Outpost Intelligent CTAs. If you want an image placeholder, choose the card to insert an image and then press ESC before choosing an image.
- Where you normally write text, add in dummy text, preferably something like Lorem Ipsum or some variant like my favorite, Hipster Ipsum. (Do NOT use some dummy text that will be embarrassing, inflammatory or libelous like so-and-so died. Always assume anything you write in your CMS might get accidentally published. If you publish Lorem Ipsum, people might laugh at you. If Hipster Ipsum, they laugh with you. If an obituary for a living celebrity, you get roasted online.)
- Put your cursor at the very end of the post on a new line.
- Press CTRL-A to select all.
- Now scroll up to the top and you will see a black bar over the first item. Click the far right icon that looks like a piece of paper with the corner folded.

7. Enter a name for your snippet and add a month and year to it, so you know what it is.
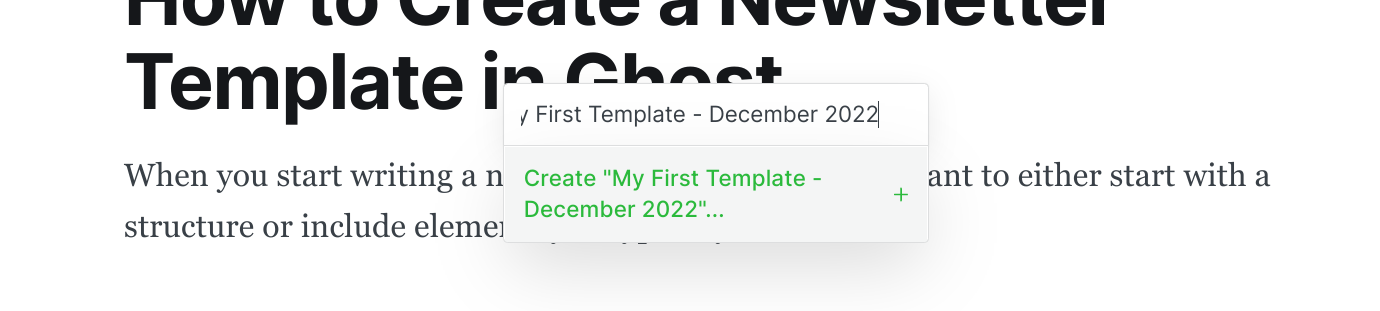
8. Click the green text starting with the word "Create" to save the snippet.
9. Now go to a new post, click the Ghost card chooser (+), scroll down to your snippets and choose the snippet you just made.
10. Celebrate because you just made yourself a newsletter snippet in Ghost.
11. Delete the original post (optional but it won't hurt anything).

Prefer a video on how it works?
Here you go:
You can make as many of these as you want, and if you no longer need one you made, simply delete it from the snippet menu (scroll down in the Ghost Card Menu (+) to the one you want to delete and look for the trash can).
There are some known limitations to this method. It does not include your headline or any tags. It doesn't change who the post is delivered to.
But this hidden Ghost feature will make your posting life so much simpler. No more rebuilding the bones of your newsletter every time you write something new.
Stay tuned or sign up for our free newsletter to get our next blog post on How to Edit a Existing Newsletter Template Snippet.